in a universe far away, a company I worked for was throwing out an HP 65. That's right. It was just going to go in the bin. Now I'm not a natural rescuer of waifs and strays, but this was sacrilege - OK, it was obsolete, the battery was shagged and the manual was missing, but this was a HP calculator. At the time I don't believe I was aware that it was, in fact, the HP calculator, but that didn't matter, throwing it out was simply a Bad Idea.
So it found it's way home and was filed, along with many other things, on the third shelf of the fourth stack somewhere in the corner of the storeroom under the empty cardboard boxes.
Which is where, a good few years later, I rediscovered it whilst looking for a cardboard box. What follows is the story of my attempts to bring it back to life.
I'm heavily indebted in this effort to the people at the Museum of HP Calculators. Without the information I was able to obtain from this site, I may not even have started this project.
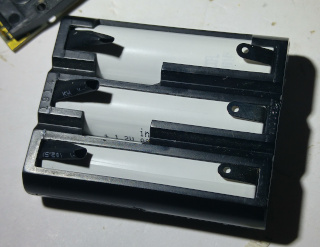
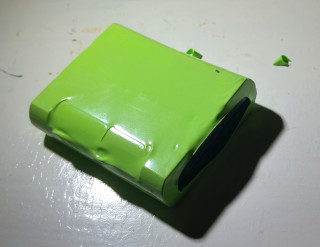
The original battery consisted of three NiCd cells, packaged in a plastic cradle, which itself then sat in the black holder in the picture below. The cells were connected in series, exposed to the outside world via some folded metal bits. The metal bits, corroded away completely in the original cradle, would then contact the gold leaf springs shown in the picture.
I decided that I could rebuild the battery pack using NiMH cells. It wasn't immediately obvious that I could do this. I wasn't certain that the voltage of an NiMH cell would suffice, or that NiMH cells could be safely charged by the original HP trickle charger. There appears to be a risk of overcharging and overheating in this case ( e.g. https://batteryuniversity.com/learn/article/charging_nickel_metal_hydride ). Although other sources are a little more sanguine about trickle charging under certain conditions ( e.g. https://www.greenbatteries.com/nimh-battery-charger-faq/ ).
I decided that if I built an NiMH battery and ensured it was removable, I could charge it outside of the device and not rely on the HP charger. However, after some googling into the world of HP65 repair, it appeared that people were doing this, and indeed you could even purchase a ready made up NiMH replacement battery pack.
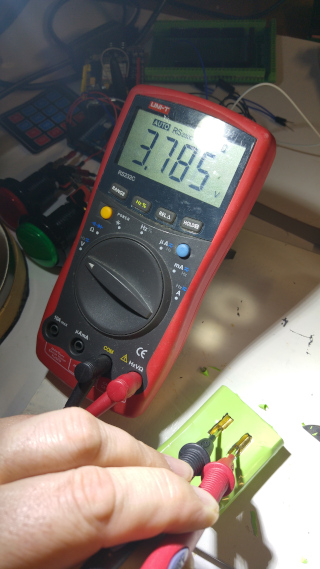
Here is piccie of three unconnected NiMH cells resting in the original cradle.
This was just a sanity check, because I would have to connect these cells together and provide some contacts to hook them up to the leaf springs before they would function as required.
Connecting the cells together and wiring up these contacts in a way that allowed the cells to still fit in the cradle turned out to be a complete PITA.
Although the batteries have 'solder tags' on each end, these are rather thin and delicate pieces of metal. If I could have connected them up using wire straps, without bending or folding them, life would have been relatively easy. However, doing this would have made it impossible to fit the batteries into the cradle in a way that still allowed the cradle to be used as intended.
After quite a lot of delicate and fiddly work, I did eventually succeed in getting things joined together ( top tip - the first two batteries are easy enough, but be careful not to inadvertently short circuit anything when you're doing the third one, or else fat blue sparks and a modicum of profanity may result ).
A couple of cunningly crafted snippets of brass connected via flying leads forms the V interface to the leaf springs :
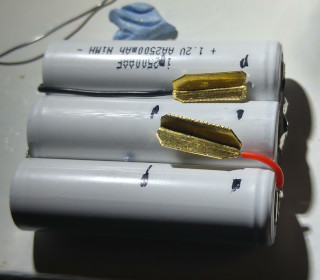
Because I didn't know better, I ordered 0.5mm brass for this, but even that is quite thick at this scale, and something thinner would have been much easier to work with.
Another fiddly bit is then to shrink wrap everything ( to hold the cradle together ) whilst ensuring the contacts stay in place. Some tiny bits of blu-tack were very helpful. I used 65mm wide ( 130mm circumference ) shrink wrap tubing, that worked fine. 60mm would probably have worked too.
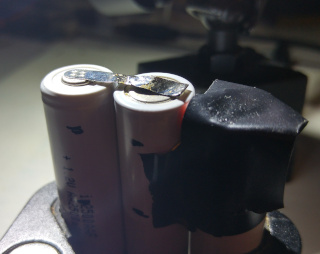
But finally, after stripping some shrink wrap away to expose the contacts, we have a battery pack in it's cradle :
Oh yeah - taking great care throughout this process to get the contacts the right way round.
The Gummy Wheel is one of the whackiest, but also inspiring, stories of creative engineering. It's worth remembering that this device was, for it's day ( 1973 ), bleeding edge technology. It cost about $4500 back in 1973, which is about $26,500 dollars today !.
One of the things this device does, which was a first for a handheld device, is that it can read and write stored programs. It does this using little magnetic strips, which the user feeds into a slot. But in order for the read/write electronics to function, the strips need to move over the read/write head ( like an old cassette recorder head ) at a very smooth and constant speed that's difficult to guarantee by hand alone.
The answer to this problem seems amusing from our perspective nearly 50 years later when half a terabyte fits into a fingernail sized bit of plastic - the strip is moved by a motor embedded in the device. The full story of this design exercise is available on the HP Museum site : https://www.hpmuseum.org/journals/65crd.htm
The Gummy Wheel is the contact between the motor drive mechanism, and the strip itself. It was essentially a small piece of tube made of Polyurethane, which is long lasting, but not immortal. As it decays, it gets soft and sticky, and eventually breaks up, and hence needs replacing.
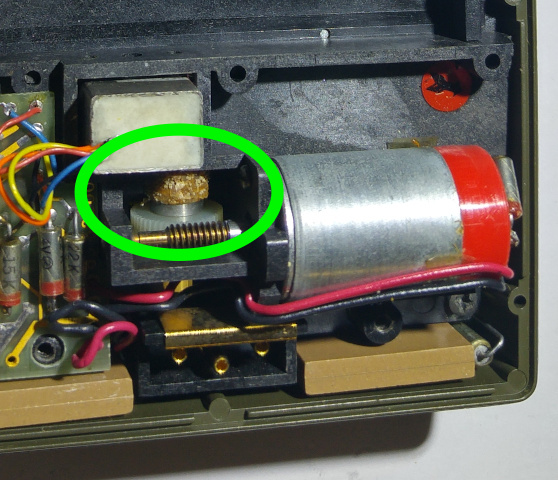
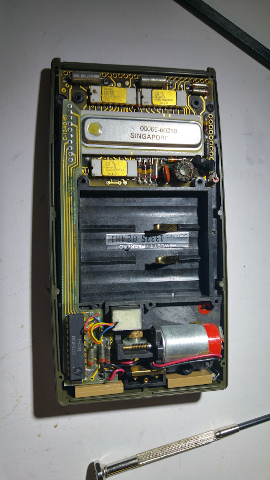
The pale brown thing in the centre of the green ellipse is the gummy wheel, showing advanced signs of fragility.
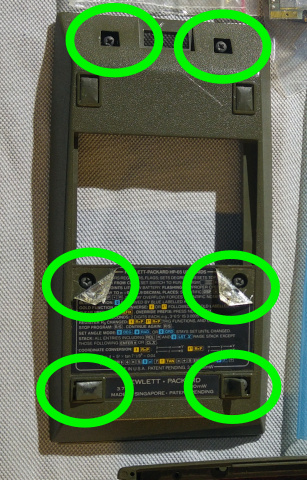
It isn't so hard to see the gummy wheel. All that's required is to remove the back from the device, noting that you will have to carefully peel up the label to get at a couple of the screws, and also the bottom feet.
However, to be able to remove the wheel and fit something to replace it requires that the motor assembly, which is on a small carrier board, is removed. This is actually held on by several screws accessed from the other side.
© Mark de Roussier 2021, all rights reserved.